D.I.Y. Promo Photo Shoot
I'm about to show you how I set-up my own home photo studio and captured some new promo photos and headshots. This is not an easy project, but knowing how to do this has made it much easier to create new promotions and posters.
How I set-up my own photo shoot
The morning after a successful self-portrait session, before I dismantled all the gear, I thought I'd shoot a video to explain my process. I am not a professional photographer. I am not a photography expert, or even hobbyist. I'm barely adequate, but I've learned enough, mostly from paying attention when I was working with pros, to be able to get some pretty good results for myself.
My studio gear
I'm not a gear-head and I don't go crazy about the latest and greatest specs. That said, I did my research when shopping and made (I think) wise investments. A studio like this requires a budget... everything you see in this video is over $1000... but I'll mention more affordable options as well.
The Camera
I'm using a Canon M50, which I originally purchased to be a "fancy" webcam for making videos. I use the standard lens that came with it. (I don't know the first thing about camera lenses, unless the first thing is don't scratch 'em!) The retail price on it was about $800 CAD new, but I'm seeing them listed second hand for about $500.
This is a "mirrorless" camera, which means a lower price, and smaller body. I've always been thrilled with the results both from this Canon M50 and before that I had a Nikon 1 which was equally wonderful for my needs.
Generally in my life I do well by trailing behind the leading edge. Some people are nuts for the newest tech, and I'm happy to pick up their hand-me-downs at a bargain. You could get great results with any of the older digital cameras for even less money. However, when it comes to shooting self-portraits a critical feature to look for is a USB/Wireless computer connection and/or what they call "interval shooting," which automatically snaps a photo every N seconds.
You can also rent cameras for about $100 per day, however they are much fancier cameras which means there are more bells and whistles to learn. I think it's a smart investment to get a second-hand camera and know how to use it.
Camera Set-Up Tip: I get best results when the camera is set slightly above my standing eye level. Looking up to the camera is generally going to get a better pose than looking down.
The Lights
These are all Neewar Bi-Colour LED panels which can be purchased in a set of two, with stands, for about $200. Again, I advise you to check your local used marketplace. I actually found my third light at the Goodwill thrift store for about $20.
Before I got these LED panels I used a photography lighting set that had compact flourescent bulbs, and before that I simply used random lamps from around the house. Heck, you can even use the sun! Place a bedsheet over the window to diffuse the light and position yourself to get the right angle.
Lighting Set-Up Tip: In addition to the three-point lighting detailed in the video, it's also helpful to position the lights as close as possible to yourself while staying out of the camera frame. Every inch of distance from a light results in a significant drop of its effectiveness.
How To Pose
Once you've got the studio set-up there is still the matter of you and how to look your best in the shots you're about to snap.
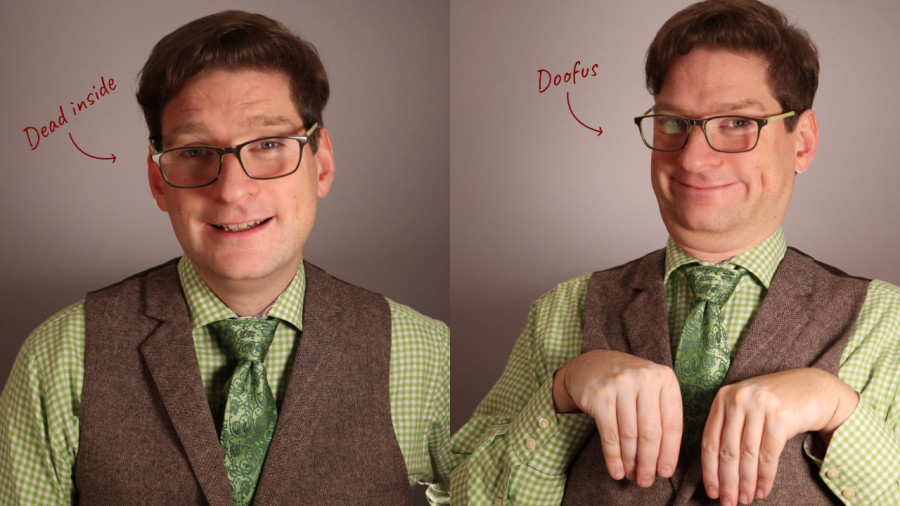
Do something to make yourself laugh
We've all seen photos, of ourselves and others, with a fake smile. It's not a good look, and doubly so for an entertainer who's job it is to be fun! Doing all the work for your own photo shoot can get tedious, and wear you down, but you cannot let it show. My best tip is to make yourself laugh during the shoot. Do stupid, goofy things, jump around, improvise with objects and props. Deliberately ruin photos.
The best photos will often be the genuine smile caught immediately after your goofball pose.
The best portrait photographers in the world often get to be that way because of thier skill for putting their subjects at ease. Only after you relax, let yourself out, can the good vibes be caught on camera. For this reason you may find it easier to get natural photos when you're at home, by yourself, working at your own pace.
Feels awkward, looks good
Any model can tell you looking graceful feels anything but. Arch your back, stick out your chin, throw back your shoulders... you sometimes need to stand in an un-natural way to create a natural look. I've learned that I need to pop my eyes open as wide as I can just for them to look "normal" in a photo. (otherwise I'm Squinty McGee.) Strike an exagerated pose and the camera will dial it back for you.
Take hundreds of photos
This particular shoot resulted in over two hundred photos, snapping one every few seconds. Quality comes from plucking the best from a large quantity. From the 250 or so I immediatly deleted thirty-ish with obvious issues (lighting, focus, my face) then combed over the set a few times to find three that I'm happy with. There's another ten "almost good" which could potentially be called into service.
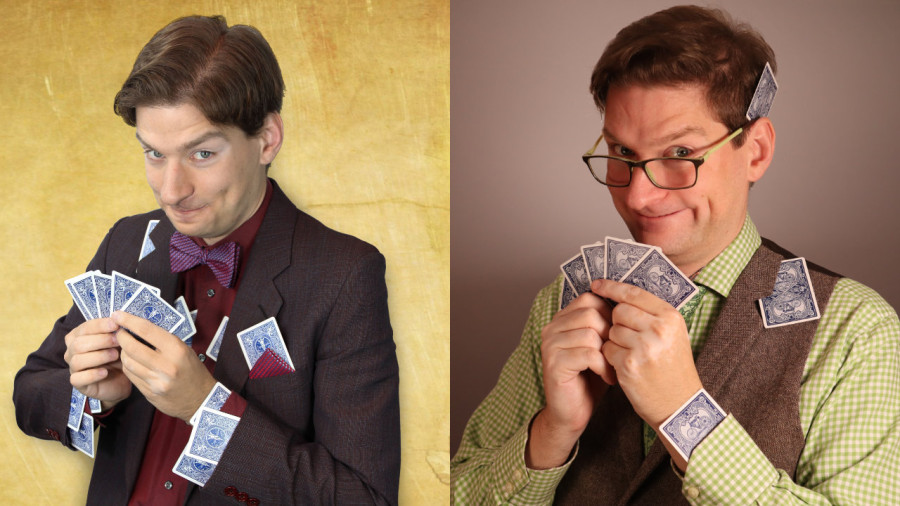
Should I include magic props?
This is a matter of personal taste, but I vote no. My thinking is that your performance should have you being more important than your props, and this ought to be matched in your photos. You are more interesting than a dove pan.
That said, one single prop can really help define your character. A magic wand is a shortcut to say, "oh, this person is obviously a magician!" A skull, along with dramatic lighting, would set the mood for a bizarre storyteller. Find a prop that is your character.
Ultimately, you ought to try it out, experiment and play with different props, but also be sure to take some shots alone. Then you get to see the result and choose the best. Just be mindful... don't use the prop as a security blanket because you're scared to put yourself in the spotlight.
Using Your Photos In Designs
I can speak to this from both sides, as I've also been wearing my graphic designer hat and working with other people's headshot photos. I can tell you what you need to get the most versatile photo.
Close-crop, or masking, your images
In my experience I almost always want to use a cut-out of your photo. That means the background is entirely removed. It allows me, as the designer, to incorporate your image into the design and place it over other elements and backgrounds.
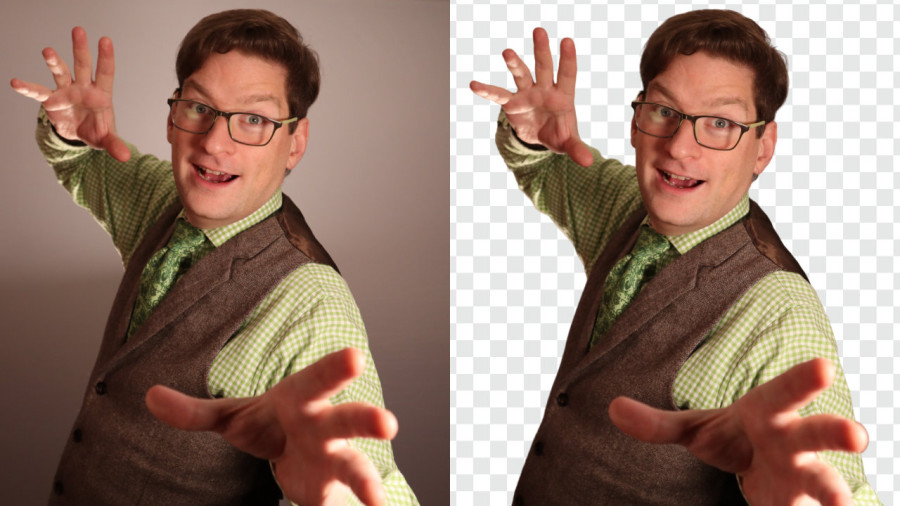
This used to be a tedious process, but with modern technology it can be done at the push of a button. If you're stuck on how to cut out your favourite photo, I can help! Send the photo to me by email ryan@magictipsandtricks.com and I'll send back the cropped result. (Note: this semi-automatic process will only work on high quality, high resolution photos.)
Mind your edges
When placing an image into a design you want to have only one edge on your photo. By that I mean the bottom edge, where the frame of the camera cuts off the lower part of your body. Be careful to frame your shot to that there is empty space to the left, right, and above your head. Having your elbow cut off, or the top of your head, severely limits where and how that image can be used.
Watch out for coloured lights
While it can make for exciting photos, coloured lights can cause trouble when you're cutting out and designing with a photo. If you are washed in blue light, for example, it looks really bad unless you are also on a blue background.
Variety Is The Spice of Promotion
If your audience (for your promotions) is always seeing the same photo used over and over again they become numb to it. The more often you can be updating and adding to your promo portfolio the more you can create eye-catching graphics. One-off social media posts is a great place to use your "almost good" photos, saving your blue steel for the main street billboard.
Do what you can to make photo shoots less of a big deal, whether it be this home studio option or simply working with photographers more often. I'd suggest it's a good goal, for a professional entertainer, to gain one new "hero" shot every year. You'll quickly gather a gallery of fantastic photos.
Got any questions? Leave a comment below. Keep in mind, though, if you're asking about some specific technical detail like F-Stops and ISO levels my answer will be a shrug and "try it and find out!"