Learn my step-by-step upholstery technique to turn any board into a nice table surface for making magic.
Step 1: Start with a board
Most any board will do. I've used all sorts, shapes, and sizes. This time around I had a custom design in mind.
I don't have the tools or workspace to be sawing wood. I sent this sketch to Heather at Re4m Fabrications and she built my table top. The brown wooden frame fits around the plywood table surface. (Side note: Having worked with this table, I think It's a little big. Next time I'll do 25 x 20 inches.)
If you also struggle in the wood-shop department, and don't have a carpenter on call, you can try going to the thrift store and hunting for a solid wood picture frame. Then you only need the plywood insert cut to size. Many lumber supply shops will do straight cuts to your specifications.
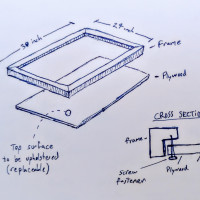
My rough sketch
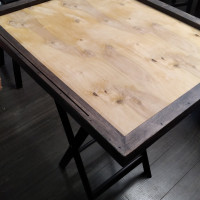
The result
Step 2: Add padding layer
I do not like to use foam. I found most sheet foam would break down over time, or be too soft. The best value I found in the fabric store was using four layers of inexpensive felt for my table padding. It will never be seen, so any colour will do.
Cut your padding layers the same size as your board. There is no need for any overlap with my frame. If you do not have a frame, I would suggest a very small overlap (or rounding the edge of your board)
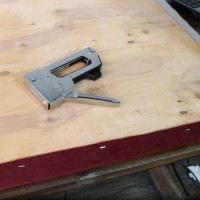
Tack your padding down with a staple in each corner. This is just to ensure it does not shift as you make it. You'll need to flip your board over in the next step.
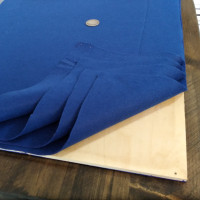
Padding cut to size
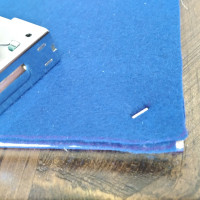
Tack the padding to board
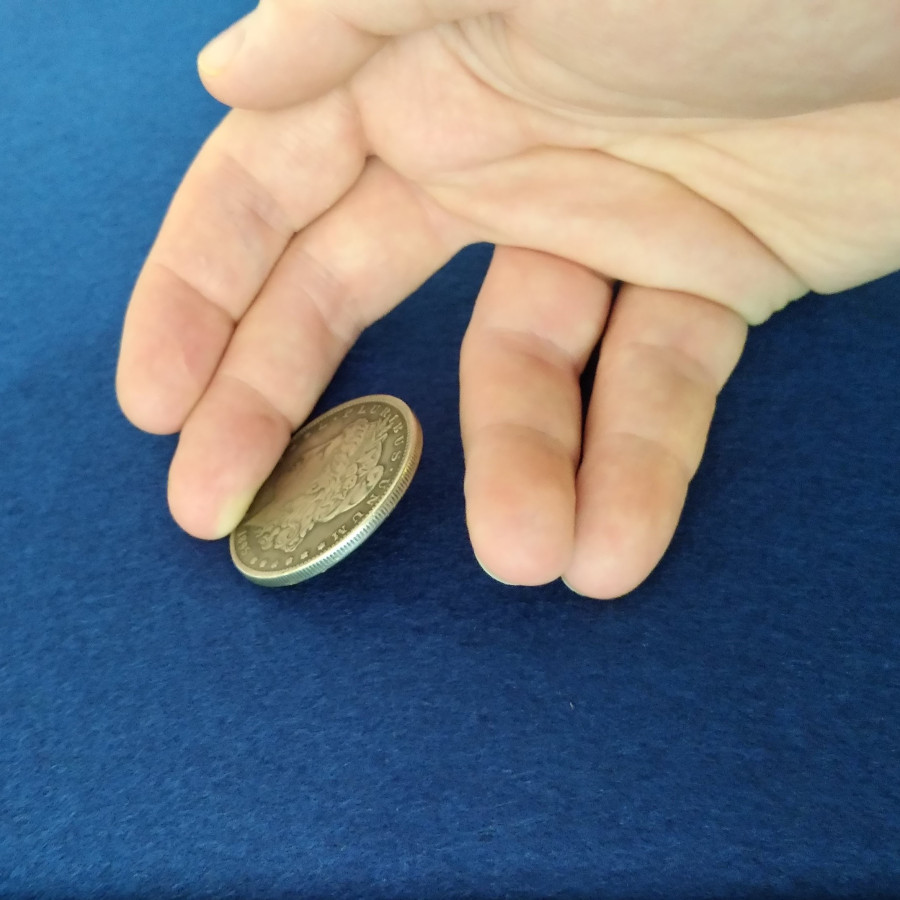
How much padding do I need?
I use this coin pick-up move as a test. Lay a coin on the padding and press down at the front edge. The back edge of the coin should lift up enough that your finger can slip underneath and pick up the coin.
Also, try setting a wine glass on your padded board. If it's too soft, the glass may be easy to tip over.
Step 3: Wrap your surface fabric
Choose a fabric the looks nice, but it also going to be functional. Whatever you use, make sure the fabric does not naturally stretch in either direction. It needs to be able to pull tight across the board without any give.
Upholstery Fabric
My new favourite! This stuff is made for couches to be strong, durable, and stain-resistant. The good stuff is not cheap. I spent about $30 on this piece, but it will last for years.
Card Table Felt
This is high quality real wool felt. Also expensive, also durable, but not as stain-resistant. A good bet if you want the classic blue/green colours.
Avoid Cheap Velvet
It may look nice, but it does not last. The fabric wears thin under regular use, especially at the edges. It's worth the investment to spend more on your fabric.
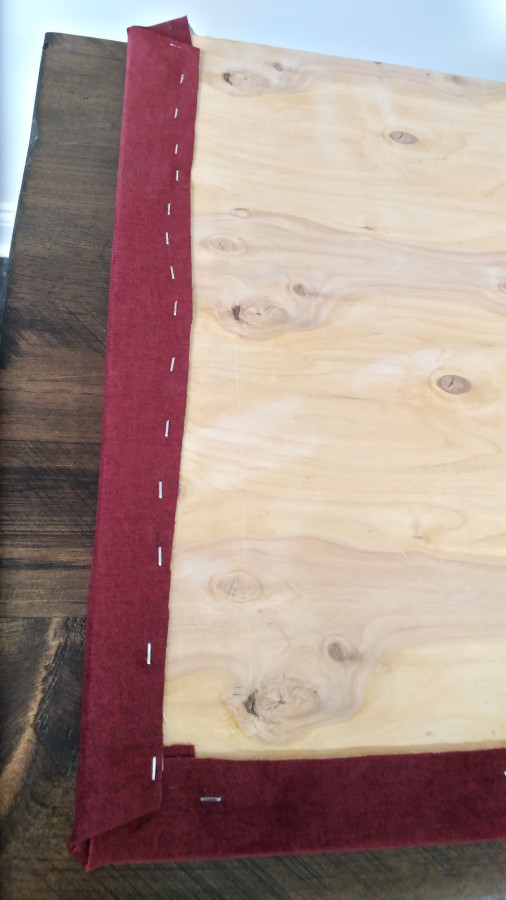
Cut your top fabric with a generous 2 to 3 inch excess border on all sides. This will be wrapped up around and stapled to the bottom-side of the board.
Begin stapling the first long side. Position staples evenly across the span, and then continue stapling halfway between existing staples. (closing the gaps)
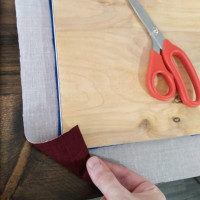
Cut your fabric
Wrap and staple
You're going to work around the edge in order, so after stapling your first side, you'll come to the first corner.
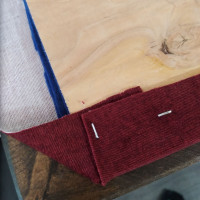
How to staple the corners
-
Pull the corner of the fabric tight and wrap on the diagonal. Staple tight in place.
-
Pull the excess fabric on one side up tight and fold flat. Staple tight.
-
Fold excess fabric underneath and staple the other side.
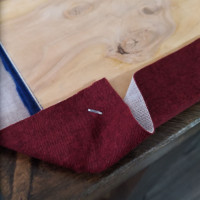
Pull diagonal corner
Fold and tack
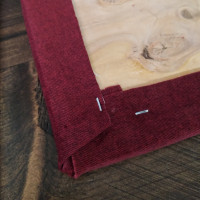
Fold in other side
Continue stapling up the next side. Use lots of staples. In a moment you will be stretching the fabric, so it needs to be evenly secured.
As you do the third and fourth sides, you will always be pulling tight, stretching the fabric, against the previously stapled edges. This is how you prevent any wrinkles or loose parts on the table surface.
Pull as tight as you can. It will naturally slip back a little bit in the stapling process. Again you use the technique of stapling the first few staples spread out wide, then closing up the gaps, stapling in between, to make sure it is tightened evenly.
As you finish, look for any staples that seem to be under pressure and add more staples in that area.
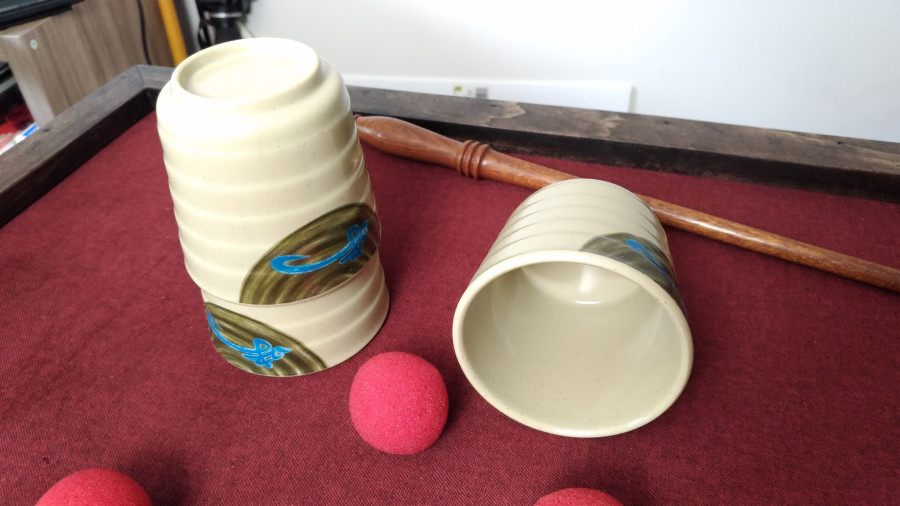
Step 4: Make magic!
Enjoy your new table top. The nice thing about using only staples (no glue) is that it's not too hard to re-do it if you're not happy with the result, or you want to replace the fabric surface down the road.

Bonus Tip: Display Slot
Did you notice the slot cut into my table frame? This was a last-minute idea I had to create a display for cards, signs, and envelopes. If they were placed flat on the table they will "vanish." Placing them in the slot holds them upright, and visible for the audience. Perfect to hold predictions you want to keep in sight and in mind.
Bonus Bonus Tip: If you plan to use this table outdoors, consider stretching a ribbon across your table surface. (stapling it underneath) This will give you something that cards and paper can be tucked under so nothing will blow away.